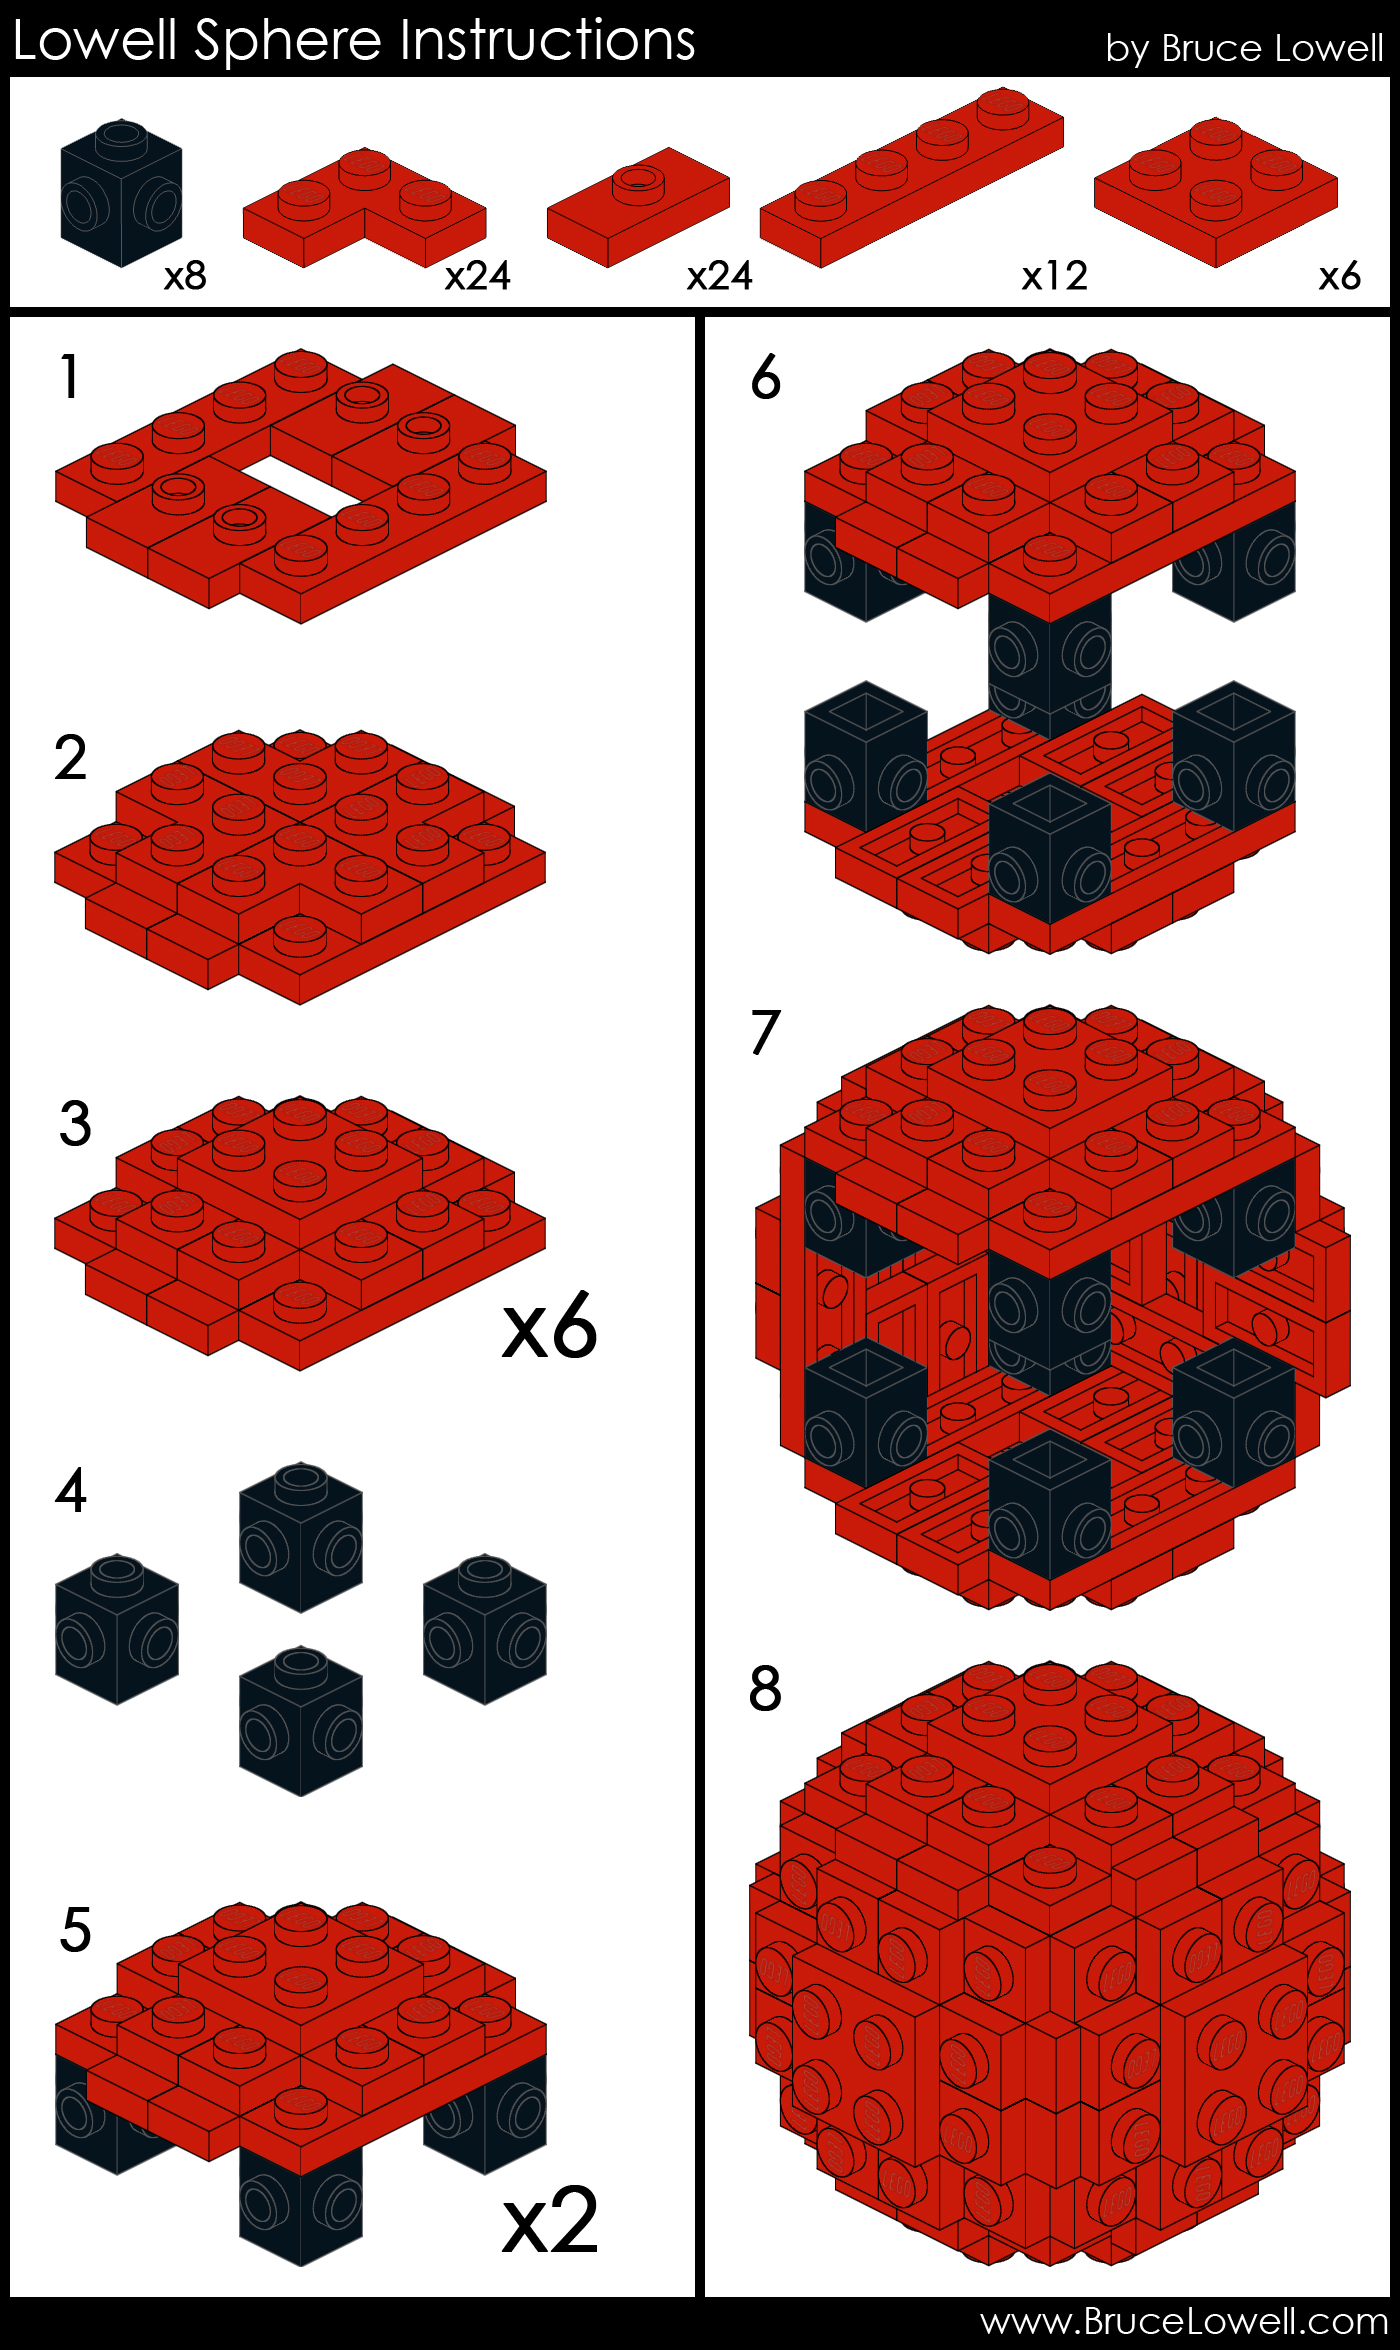

We have had many compliments on our Easter themed MOC in the club showcase display at Hawaii’s Ala Moana LEGO Store, and specifically questions on how we made the eggs. For those that are interested in making your own Easter Eggs, here’s how it was done. Essentially, you will be following instructions on how to build a Lowell Sphere or Bram’s Sphere, but elongate the sphere along the body of the egg to make an ovoid shape. To do this, use the instructions below but add longer plates in one direction on the 4 side panels.
There are programs online that will generate an image for you to give you an idea of how to put it together, and you can use any combination of plates you have that will make this pattern as long as it won’t fall apart. So, make sure it’s supported. Then, just use your imagination for what colors you want. The easiest ones were the monochromatic eggs. After assembly just use any small decorative pieces in different colors on the studs of your egg after assembling to make them more festive. The other ones are a little more challenging, as you have to be careful and precise with incorporating different colors into the pattern while making the panels if you want to give it a symmetric painted effect. Take careful note in step 7 below on how the panels are arranged and you’ll know where to place the different colors. You can choose to make different layers different colors which is easier. Or you can choose to make stripes or other patterns, which takes even more careful planning. Once it’s assembled you can add more decoration and your eggs are done. Happy building!